You have built a residential building; you want to move in as soon as possible and finish the internal arrangement. The question arises: how to heat water and heat rooms if the house is not gasified? The simplest way to quickly organize heating and hot water supply is to install a dual-circuit boiler operating on liquefied gas (in short - LPG).
The heating unit must be reconfigured to the propane-butane mixture, and after summing up the main line, restore the factory settings. We will reveal the features of installation, commissioning and operation of a heat source using bottled gas.
How liquefied gas differs from natural gas
As is known, methane prevails in the composition of the main gas, whose lower calorific value is approximately 9 kW / m³. The substance is transported and burned exclusively in a gaseous state, the transition to the liquid phase occurs as a result of cooling to deep low temperatures.
LHG - liquefied hydrocarbon gases used in boilers, water heaters and internal combustion engines of cars, are a homogeneous mixture of propane and butane. We list the properties of this fuel:
- calorific value - about 6.4 kW with 1 dm³ (liter);
- gas easily passes into the liquid phase under the influence of pressure;
- LPG is transported and stored in the form of liquid pumped into standard cylinders or storage tanks;
- before burning, the fuel must evaporate; propane-butane is supplied in a gaseous state to the boiler burner or internal combustion engine cylinders;
- over time, condensate accumulates at the bottom of the tank, taking away the useful volume of the vessel.
Addition. A significant advantage of methane over LPG is the price - natural gas is significantly cheaper. Even higher calorific value and lower propane consumption do not cover the difference in cost. A more detailed comparison of different types of fuel is presented in a separate review.
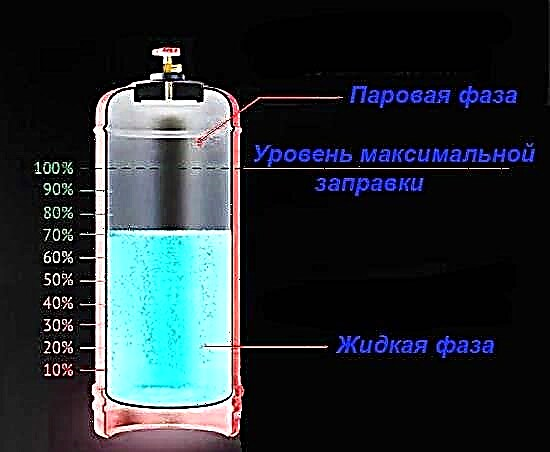
When refueling with liquefied fuel, the tank is never filled to the top. 1/5 of the tank (20%) should remain empty - this volume is used to transfer fuel to the gas phase. If you fill the vessel to the eyeballs, the evaporation area and the number of LPG ready for burning will decrease sharply. A maximum of 40 liters of propane is refueled in a standard 50 liter bottle.
Tips for choosing a gas heater
Despite the differences between main methane and liquefied hydrocarbons, the same equipment is used to efficiently burn these substances. To switch from one fuel to another, the boiler installation is adjusted as described in the following sections of the publication.
Key moment. Any propane gas boiler successfully consumes natural gas and vice versa. Using both energy sources at the same time or switching at the touch of a button does not work - the transition includes partial disassembly, replacing the burner fuel nozzles and setting the gas valve.
Accordingly, you need to choose and buy a heat generator for heating a private house according to the standard algorithm:
- Determine the power of the boiler unit. The best way is to calculate the heat load for heating and multiply the result by a safety factor of 1.2. When buying a dual-circuit boiler for domestic hot water, lay one and a half stock.
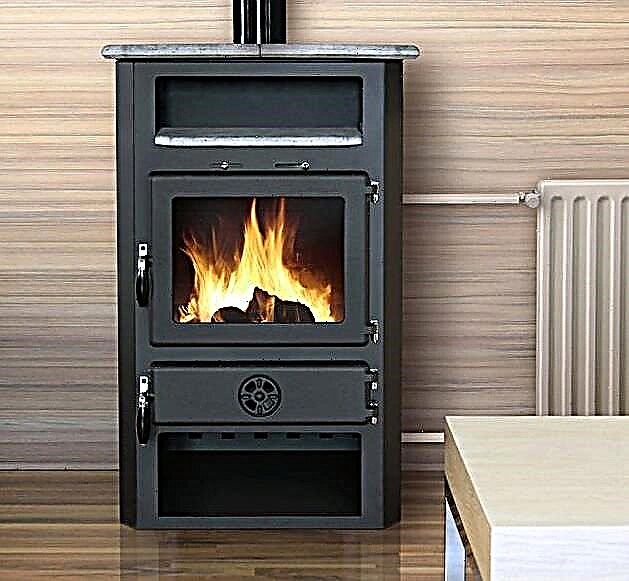
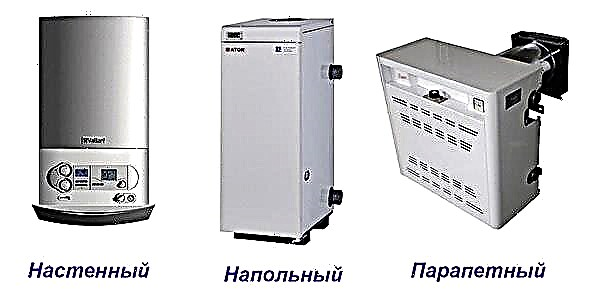
- Choose a floor or wall model of the heat source. For a closed type pumping system, it is better to take a suspended unit, for gravity wiring - a non-volatile stationary boiler.
- The best solution in the absence of a chimney duct is to supply a turbocharged version of the heater with a closed combustion chamber. The removal of combustion products is organized through a double-walled coaxial chimney, laid horizontally through the nearest outer wall.
- If you have a branch channel and a limited budget, feel free to take an atmospheric heater, it will cost less than a supercharged model.
- Among dual-circuit plants, it is better to choose the option with a separate plate heat exchanger operating on hot water. Such a water heater is easier to maintain than to clean a heat generator with a combined countercurrent heater.
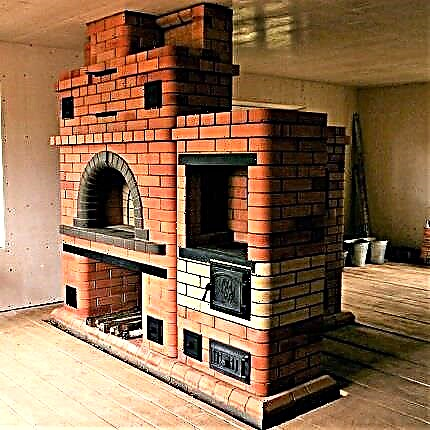
Note. For country houses and small apartments (up to 100 m²) there is a budget option - the so-called parapet boiler with a capacity of up to 12 kW. The unit is placed near the external wall and does not require the installation of a chimney - a short coaxial pipe is led directly to the street. Moreover, the combustion chamber is open, there is no fan and electronics.
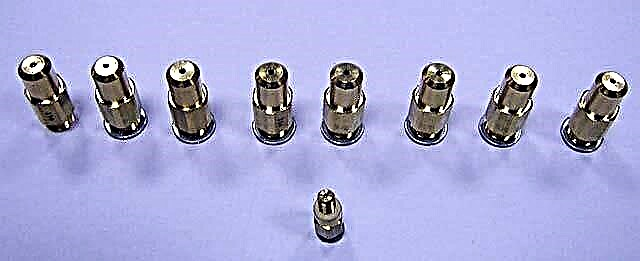
Initially, any of the listed heaters is designed to work with natural gas - methane. Since the calorific value of LPG is higher, fuel jets need to be replaced in the boiler (people call them nozzles). Hence the advice: when buying a unit, immediately request an additional set of jets with holes of a smaller diameter, designed for liquefied gas.
Since we are considering the problem of switching to LPG and the subsequent operation of such plants, the topic of choosing a heat generator is covered briefly. You will find more useful information on this issue in another publication - how to choose an economical boiler in an apartment or a private house.
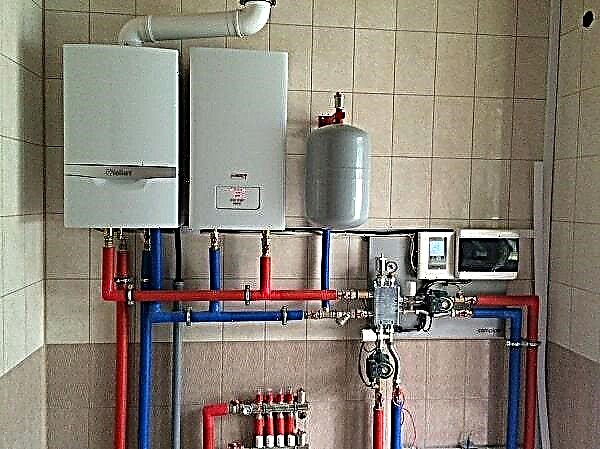
Subtleties of installation and arrangement of the boiler room
Immediately we want to highlight an important point. Installation, connection and start-up of a heating unit under LPG is allowed to be carried out independently, but taking into account the following nuances:
- If you plan to subsequently gasify the house and connect the boiler to the mains, installation must be done according to the requirements of the standards, without any violations. Otherwise, the provider organization will not issue a permission to connect.

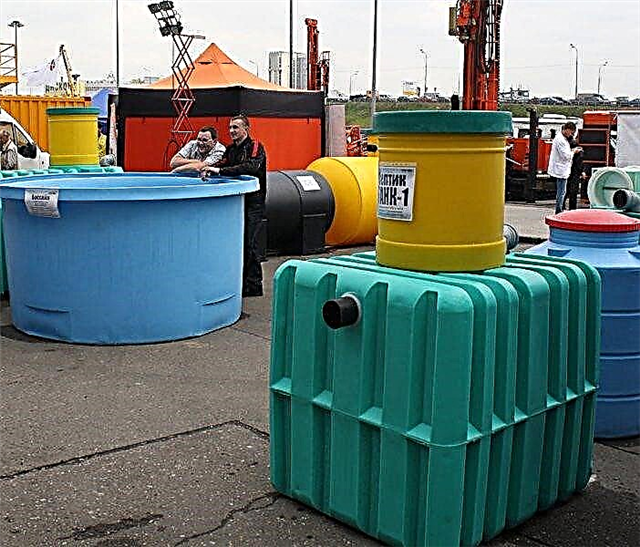
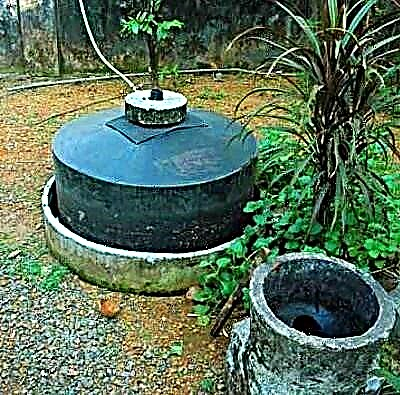
- Another situation: accession to the gas pipeline is not planned. Then you need to put an underground fuel tank on the site - a gas tank, cylinders - a temporary option. Here you can not do without a project, hiring a specialized company and putting the object into operation. So, the gas boiler must be installed in accordance with all the rules.
- You do the work at your own risk. Therefore, you are fully responsible for the safety of your home and your loved ones. We advise you to bring in an intelligent engineer - a specialist in gas supply, at least as a consultant.

Reference. Without documents on the commissioning of the gas tank and heat-power equipment for operation, it will not be possible to organize the filling of the LPG tank.
General requirements for the premises and installation of gas-powered heaters are set out in a detailed manual on a separate resource page. Here we list the points associated with the use of liquefied fuel:
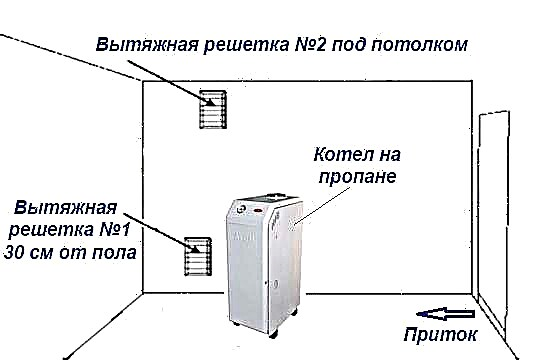
- Propane + butane is a rather insidious gas, it is heavier than air and in the event of a leak it accumulates in the lower zone of the room. The furnace ventilation will have to be adapted - place one exhaust grill at a height of 30 cm from the floor, the second - under the ceiling. Inflow is provided at the opposite end of the room.
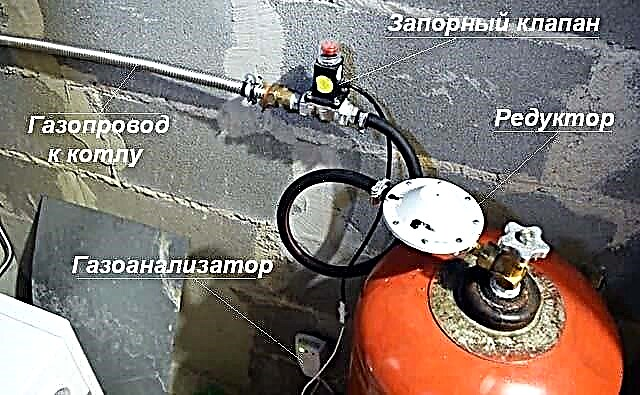
- For the same reason, a gas analyzer connected to an electromagnetic shut-off valve should be bought and installed above the floor. The latter is mounted on a pipeline supplying fuel from cylinders or a gas tank.
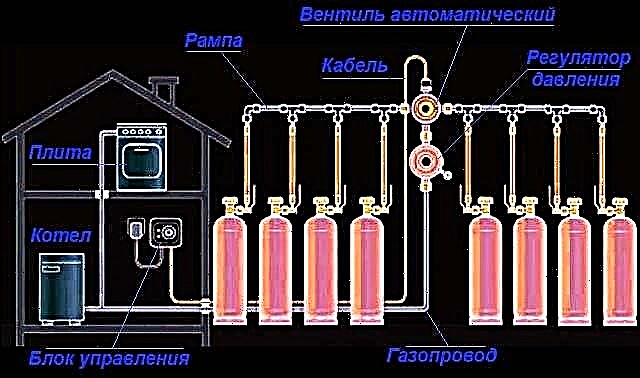
- It is strongly not recommended to place propane tanks in the furnace. The gas pipeline is led through the wall to the outside, where a metal cabinet with cylinders connected to a common fuel rail is equipped.
- A gas holder cannot be dug closer than 10 meters from a residential building.
- The minimum number of cylinders is 2 pcs., And preferably four.One vessel will not provide the required fuel consumption due to the small evaporation area. Liquid fuel does not have time to turn into gas, the pressure in the network decreases, the boiler turns off or does not warm the water.

Tip. For the winter, in a street cupboard, do the heating of the tanks - put a fan heater or a special element worn on the cylinder. Due to the temperature drop, the walls of the tanks are frozen, the evaporation rate of the combustible mixture decreases. The result is a lack of gas, poor heating of the coolant and cold in the house.
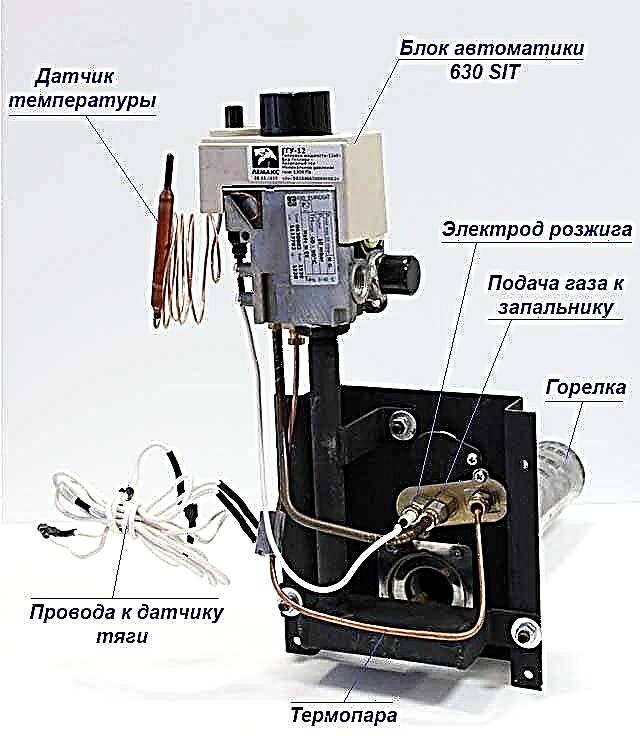
Since the propane pressure in the closed vessels exceeds the rate of supply to the burner, the pressure must be reduced. At the exit of the ramp that unites the cylinders, a pressure gauge and a reducer with an adjustment range of 20 ... 60 mbar are installed. Traditional "frogs", designed to maintain a constant pressure of 30 mbar, are successfully combined with floor heaters equipped with Italian automation SIT 630 and 710.
Transfer of a wall boiler to LPG
The procedure includes 2 operations - replacing nozzles (jets) and adjusting the gas valve for pressure at various combustion modes. To perform the adjustment work, you need to prepare:
- standard set of tools - screwdrivers, pliers and so on;
- open-end wrenches and hexagons of small sizes;
- gauge arrow or electronic, showing pressure in millibars;
- flexible connecting tube suitable for fittings on the boiler.
Tip. The diameter of the tube is more convenient to select after removing the front panel of the heat generator. The size should be enough to fit the pipe tightly on the outside of the valve fittings.
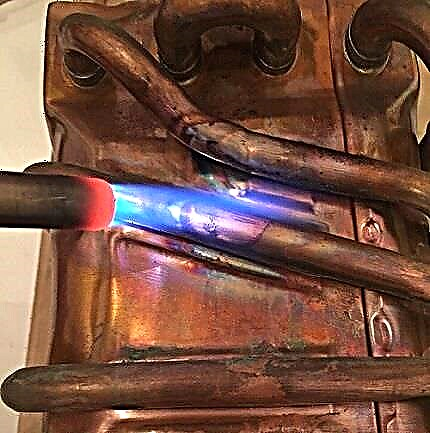
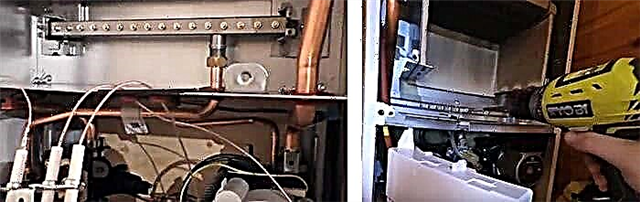
The first stage is the partial disassembly of the unit and the dismantling of the gas burner device. The goal is to get to the inner panel of the collector, where regular jets are screwed. The sequence of work depends on the model of the boiler and as a whole looks like this:
- Remove the front panel of the device. On heaters of the brand Viessmann, Baxi, Buderus and the like, there is a control board behind it, which must be folded forward.
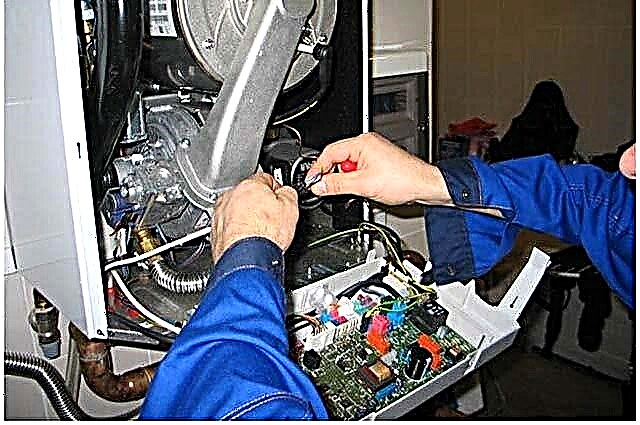
- Disconnect the ignition electrodes and pilot burner (if equipped).
- Unscrew the self-tapping screws holding the main burner. Remove the part and set it aside.

- On the rear wall of the unit is a manifold with nozzles. Change the nozzles by unscrewing with a flat screwdriver. Put the burner and electrodes back.


Recommendation. Before disassembling and adjusting, be sure to read the boiler operating instructions! The document often describes the procedure for converting to liquefied gas and indicates the pressure limits that need to be set on the valve.
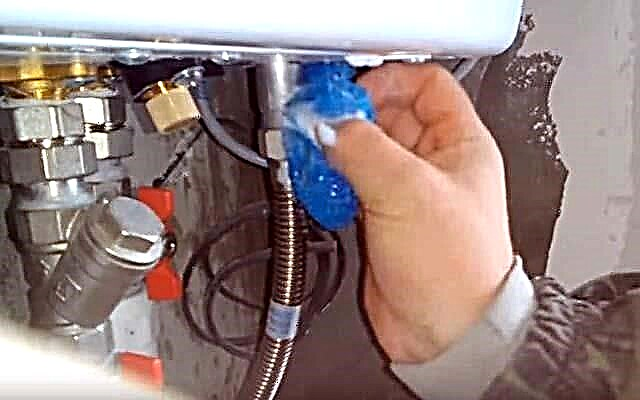
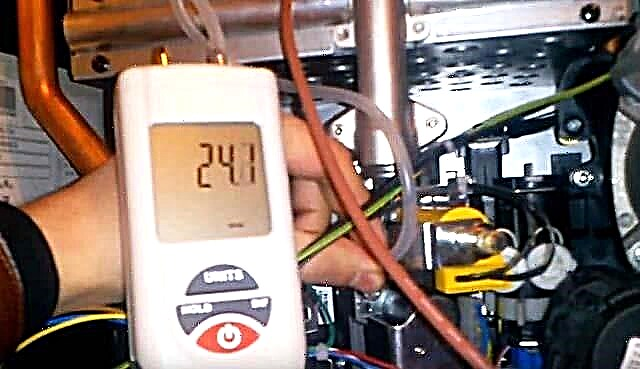
After replacing the nozzles, supply fuel to the boiler and check the quality of the connections by soaping. Set the pressure on the pressure reducer 36-40 mbar (the exact value is indicated in the passport of the heat generator) and proceed with the adjustment.
The second stage - the gas boiler is configured in the following order:
- Find 2 diagnostic nipples and the adjusting element located directly on the valve. The tuning bolt is made in the form of a hexagon with a screw or a second hexagon inside (depending on the model of the device).
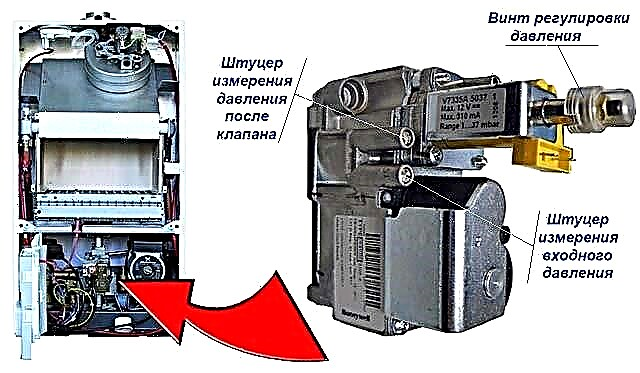
- Remove the screw plug from the bottom fitting, connect the pressure gauge tube and measure the gas inlet pressure. Compare the indicator with the norm prescribed in the instructions. If the value is lower than required, open the valves of 2-3 cylinders with propane.
- Switch the hose to the upper diagnostic fitting and start the boiler at 100% power. Use the large external hexagon to adjust the pressure in this operating mode. You look at the norm according to the passport, usually the indicator lies in the range of 22-28 mbar.
- Set the heat generator to the minimum power mode and repeat the setting by turning the internal hexagon or screw. Be sure to hold the external regulator with a key.
- Check the operation of the unit in the modes of heating and water heating in domestic hot water. Assemble the boiler in the reverse order.


An important point.In parallel with the mechanical adjustment, a software adjustment is made. The algorithm is individual for each type of heat source and is described in the instruction manual. How to transfer the electronics of the Proterm - Panther boiler to liquefied gas and adjust the pressure, see the video.
Why is it important to read the product instruction manual. First, you need to find out the adjustment parameters. Secondly, in some models of thermal installations, for example, Daewoo, there is a special switch on the control board, you do not have to connect the pressure gauge and turn the screws at all.
In older atmospheric models equipped with a pilot burner, the wick flame needs to be adjusted. On propane, the igniter burns harder and will waste gas bottoms. Find the appropriate tuning screw and reduce the flame to a size of 2-3 cm. By the way, the stated step-by-step instructions are also suitable for transferring gas columns to LPG.
We reconfigure the floor heat generator
Non-volatile boilers of the AOGV type, equipped with automation of the 630 SIT and 710 MiniSIT series, are converted to liquefied gas in the same way as the wall-mounted “brothers”. The transition is done in 2 stages - the installation of new jets and the subsequent pressure adjustment.
We will not consider disassembling and dismantling the burner - this topic is described in detail in the publication on cleaning gas heaters. Put the nozzles from the liquefied gas kit and proceed to the setting:
- Remove the top plastic cover from the 630 SIT valve. At the right end, find the screw for adjusting the pressure of the fuel supplied to the main burner.

- On the left side of the automation unit are 2 fittings. Connect the pressure gauge to the upper nozzle, having previously unscrewed the plug.

- Ignite the boiler and bring the burner to maximum mode by setting the power control washer to the number “7”.
- Turn the screw clockwise to increase the propane mixture pressure to the desired value (usually 26–28 mbar).


Warning. After unscrewing the plug, gas escapes from the nozzle with a quiet hiss. To minimize leakage, rather wear a hose to the pressure gauge.
The igniter flame is regulated by a small screw located on the upper plane of the automation (see photo). Reduce the intensity of combustion, but do not overdo it, otherwise the wick will go out from the gusts of wind from the chimney. The pressure in gas convectors equipped with 710 MiniSIT and 630 SIT valves is similarly adjusted.
Reviews on the use of liquefied gas
The undoubted advantage of burning LPG is the convenience and ease of maintenance of thermal equipment. Minus - a rather high price of propane compared to other energy carriers. If a house with an area of more than 100 m² is heated from cylinders, then the convenience advantage disappears - vessels need to be refueled at intervals of 4-7 days, depending on the street temperature.
Reference. The cost-effectiveness of autonomous heating using liquefied gas is a myth. As in the case of other energy carriers, fuel consumption depends on the heated area, the degree of insulation of the home and other factors.
Features of the operation of liquefied fuel boilers, we propose to present in the form of reviews from real homeowners:
- They decided to heat their house with an area of 120 squares with liquefied gas from the cylinders located in the street cupboard. The boiler is powered by 5 tanks, the sixth provides a hob. When a light frost came (minus 2 ° C), the cylinders froze, the heater turned off due to lack of fuel. It turns out that the cabinet needs to be additionally heated.
- I use propane only in the evenings and on weekends, otherwise the gas quickly ends. When I leave for work, I turn on electric heaters. With this approach, 2 cylinders can be stretched for 7 days (housing area is unknown - note).
- The acquaintance placed a balloon ramp in the basement; he did not install sensors or signaling devices.There was a leak, propane accumulated in the lower area of the cellar. The owner, not feeling the smell, turned on the light and an explosion rang out. The garage fell apart, the man got a shell shock.
- I use liquefied gas as an additional energy source - the main heating is powered by electricity. The boiler on LPG allows you to reduce the load on the network on frosty days or dramatically raise the temperature in the rooms. During the heating season I’m doing 4-6 gas stations.
Source - a popular forum.
Conclusion. It makes sense to transfer the boiler to liquefied propane-butane in two cases: when installing a gas tank and organizing temporary heating, until a centralized gas supply pipe is brought to the house. Our expert will tell more about the nuances of installing and operating fuel equipment in his video:
Conclusion
The conversion of boiler plants using liquefied bottled fuel should be carried out by specially trained personnel. We laid out the instructions for installing and setting up the heat generator for informational purposes. It is not recommended for homeowners who are not versed in gas equipment to arrange fuel supply and change the settings of the boiler or convector independently.