Do you have plastic communications systems in your private home and need upgrades or repairs? It’s easy to install plastic on your own, thanks to the features of this material, right? But how to crash into a plastic pipe if it is under pressure? And is it possible to do it yourself?
We will give you answers to your questions. Here, several methods for organizing the withdrawal from an existing highway are considered. The insert options are provided with a detailed description of the process and are supplemented with a photo, which will allow you to understand the intricacies of the installation technology of cheap and durable plastic pipes.
Following the recommendations in the videos, you can do most of the work on your own, without involving experienced plumbers.
Features of inserting bends into pipes
Pipelines made of plastic are different. Some are used to supply water, others to divert it.
There are public highways, and there are personal house and apartment networks. And each option has its own nuances of the work.

For insertion into the street pipe of the central water supply system or village sewer, permission is required from the owner of the networks, it is forbidden to arbitrarily carry out such installation works
In order to crash into the general centralized system and not get any problems with the law, it is necessary to go through preliminary approvals. It is best to sign all the necessary papers and insert the work itself to a specialized organization. This will greatly simplify life.
But no one bothers to bump into a plastic pipeline inside an apartment or private house. You can do this at almost any point. It is only necessary to observe elementary rules and not to overload the system with an abundance of plumbing devices.
The water pressure in the water supply should be enough for all devices and all users. A sewer pipe can only accept the volume of effluents for which it was originally designed.
There are several types of plastic pipes:
- "PP" - polypropylene;
- "PE" - polyethylene (most often it is PND);
- "PVC"- polyvinyl chloride;
- "PEX" - made of cross-linked polyethylene;
- PEX-AL-PEX - metal-plastic.
It is recommended to use some of them for distribution of hot water supply and heat supply systems, and others only for supplying cold water or its discharge. The insert technology for all plastic pipes is very similar.
The differences relate to how they are connected to fittings and to each other in cases where an additional element is inserted into an existing pipeline.

The easiest way to bump into a sewer pipe. Often it is enough to drill a hole of the desired diameter and insert a pipe with a rubber cuff into it - there is no special pressure in the sewage system, such a connection is quite enough
All techniques for inserting a tap into a water pipe made of plastic can be divided into two groups:
- Cutting a pipe section and inserting a tee in its place.
- Lining on a pipe of a collar (saddle) with a branch pipe.
The first method involves performing welding with a special soldering iron for plastic or using clamping fittings.
In the second case, the presence of the superimposed part is sufficient. It is simply put on the pipe and mechanically tightened with bolts or imposed on a plastic surface and welded to it by means of built-in heating spirals.
Image Gallery
Photo from
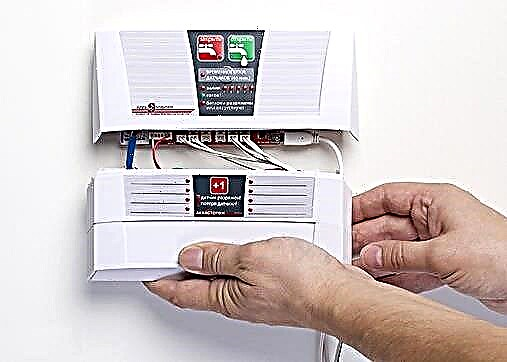
Connection of additional and secondary lines
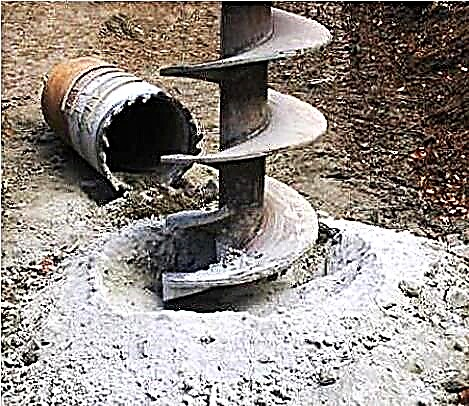
The option of tapping into a water pipe under pressure
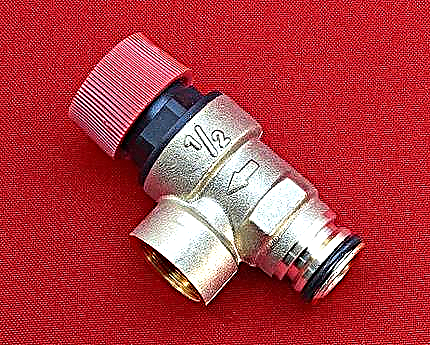
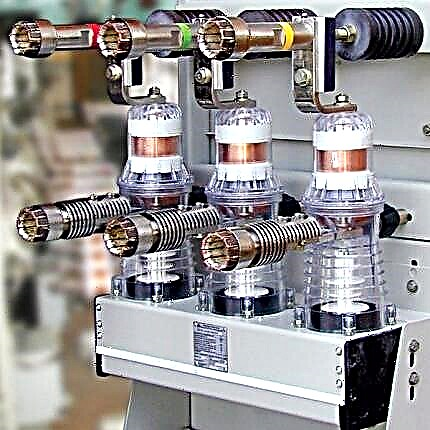
Connection of flowmeters and control valves
Sealed assembly
Sidebar Options
The most reliable technology for inserting into a plastic water pipe is the method of inserting a tee into it. In fact, this is a common branch installation using standard fittings. First, a section is cut out of the pipeline, and then a part with a tap is mounted in its place. However, it is not always possible to use this option.

If the pipe is located close to the wall, then cutting out the part for inserting the tee from it is problematic, it will be even more difficult to solder the plastic using an iron
The use of linings (clamps, saddles) simplifies the process of tapping into the water supply. And if it is under pressure, then this is the only possible option. To install the tee, water will have to be completely drained from the plastic pipeline, and for insertion using special saddles, this is not particularly necessary.
Method # 1 - tee or collector
The main problem with any method of tapping into a water supply system is the pressure of the water. Best when it is blocked. Then there will be no spray during the work, which is simply dangerous, since you have to work with power tools. And welding of plastic pipes according to the rules should be done dry.

If there is no experience in installing plastic pipelines with electric brazing or gluing, then it is better to refuse the option with a tee insertion - there are much fewer risks of error when installing the saddle plate yourself
As an insertion element for branch organization, you can use:
- regular tee;
- a manifold for connecting multiple branch pipes.
- a pre-prepared piece of pipe with a soldered bend.
The end with a branch pipe is threaded and soldered. The choice of fitting type depends on the type of plastic and the type of installation of the entire pipeline system.
If the water supply system was originally made in a collapsible version, then the insert into it should be done with a threaded connection. And if the entire pipeline was carried out by welding with an electric soldering iron, then it is better to insert the insert into it in the same way.
Tee insert technology is as follows:
- The water overlaps and completely drains from the system.
- A pipe cutter cuts a pipe section in size so that it is possible to connect an additional fitting in its place.
- Mounting the tee with a soldering iron (for HDPE and polypropylene) or glue (for PVC).
- Installing a tap valve on the tap.
After installing the tap on the created branch, further work can already be done with the water turned on. Plastic pipes can be welded when tapping the outlet, but also into the socket. Both options are acceptable.

The method of connecting plastic pipelines is selected based on their material, and fittings and tees according to their characteristics must correspond to the installed pipes
If you get to the water supply with a soldering iron it is problematic because of its proximity to the wall, then you can use collet clamps or press couplings. To do this, first prepare a pipe section with a welded bend, and only then it is inserted into the cutout in the water supply.
The insert into the metal-plastic pipeline is made using a threaded (compression) fitting:
Image Gallery
Photo from
To connect an additional line to the metal-plastic pipeline, we purchase a tee. Its nozzles should be equal to the diameter of the main and connected lines
Attaching the fitting to the installation site, mark the points of the future cut. You need to cut strictly perpendicular to the axis of the pipe
Having set the shears for cutting polymer pipes perpendicular to the axis of the pipe, we cut the pipeline according to the marking
In the case of close laying of the cold and hot line, i.e. if between them less than 10 cm, install an insulating corrugation on a cold branch. If the distance is more than 10 cm, this item is optional
On the inside of the cut pipes, first we remove the bevel of 1 mm, then flatten the pipe with a reamer, trying to give it an ideal shape, somewhat deformed by cutting
We put on the pipe and the union ring first prepared for connection to the pipe. Then we put a fitting in the pipe and turn the nut all the way
We arm ourselves with two adjustable wrenches. One will hold the fitting body, the second - tighten the nut until 1-2 rings remain on the thread. Should crank about 1 - 2.5 turns
We install all the lines planned for the insert in the same way. We open the tap, which blocked the water supply to the apartment before work, and check the tightness of the created nodes
Step 1: Compression Branch Tee
Step 2: Marking the fitting installation area
Step 3: Cutting the pipe according to the marking
Step 4: Installing the Thermal Insulation Cover
Step 5: Preparing the pipe for fitting
Step 6: Installing the union and union nut
Step 7: Tighten the compression fitting
Step 8: Assembling the Tee Piping System
Method # 2 - electrowelded saddle
Under the overhead saddle on the pipe is understood the detail of the water supply, which is intended for the organization of branches from the main highway.
This element greatly simplifies the installation of branching units and does not imply a violation of the through integrity of the tubular product. To perform a tap in a plastic pipe at the insertion point, only a hole of the required size is drilled.

To install a saddle, you do not need a lot of space, it can be mounted even in tight places and wells - you can crash with the help of such a fitting into the water supply in any part of it
An ordinary saddle is fixed to the pipe with clamps and bolts. Its electrowelded analogue has built-in heating spirals in its design. When voltage is applied to them from the mains, these elements melt the plastic, which after cooling forms a reliable connection between the fitting and the water supply.
The technology for mounting an electrowelded saddle is based on electrodiffusion welding. Moreover, all the heating elements are already mounted in its housing at the factory.
It is only necessary to connect them for several minutes to the power supply. In the welding process, it resembles the method using a soldering iron, only in the case of a saddle everything is already assembled in it.
A similar pad is intended for insertion into the PND pipe. It is polyethylene that, when heated, first passes into the desired elastic state, and then hardens without loss of strength characteristics. As a result, the plastic of both parts to be welded is joined into a single mass, which is difficult to tear.
After cooling, the saddle and pipe become an indivisible whole. Such a connection is able to withstand a water pressure of 16 atmospheres, which is more than enough to complete the installation of a water supply system in an apartment or a cottage. Electric-welded saddles come with and without a built-in cutter - the first option is designed for work on pressure pipelines under pressure without overlapping water.
Image Gallery
Photo from
Fittings for connecting HDPE pipes
Connection to an electric welding machine
Selection of welding mode and time
Super strong and tight knot
Installation of such a fitting is extremely simple. It consists of one or two parts. In the first case, this is simply an overlay on the pipe from above, and in the second, a clamp is also connected to it from below for greater reliability. This saddle just needs to be installed in the desired section of the water supply and glued by applying electric current to it.
After the plastic has hardened, it remains only to drill a hole through the pipe in the trunk and connect a hose or pipe to the branch to the plumbing to be connected. The diameter of the plastic pipe and the plunge bend can be very different. It is only necessary to choose the pad of the right size.
Drilling a hole is made with a thick drill or a ring mill. The main thing here is not to press too much on the plastic pipe so that it does not crack.
If the milling cutter is already in the saddle, then it is enough to scroll it with a wrench, and then remove it from the drilled hole. Then it remains only to connect the drainage conduit - and the branch is ready.
Method # 3 - crimp clamp (pad)
In addition to the electrowelded saddle, there is its simpler counterpart - the overhead clamp. It consists of two separate parts pulled together by bolts. One for lining the top of the plastic pipe, and the second bottom to attract the upper part. A gasket is additionally inserted between them to prevent leakage.

Sidebar Scheme. The number of tightening bolts and the size of the crimp clamp depend on the diameter of the pipe into which the insert is made
Usually the upper and lower superimposed parts exactly repeat the dimensions of the pipe. But there are universal clamps, in which the top is made small, and instead of the bottom there is a metal strip for the screed.
Outwardly, they resemble repair analogs for connecting with a hose or closing fistulas. Only in the upper part they have a pipe for connecting the outlet.
Clamps for tapping into a plastic pipe are:
- with stopcock;
- with integrated cutter and safety valve;
- with flange or threaded end made of metal;
- with a plastic butt for soldering or gluing.
To make an insert, the clamp is put on the pipe and fixed on it with nuts or bolts, depending on the design. After that, drilling is performed through the existing branch pipe. And then the tap itself from the trunk is connected.
Drilling a pipe without installing a clamp or saddle on it is not recommended. You can make a mistake with the diameter of the drill and the drilling point. It is best to do this through the pipe of a fitting already installed for the branch. So the drill in size will definitely be slightly smaller than the internal section of the plunged tap and installed will be exactly where you need it.
A crimp fitting on a metal-plastic pipe is put using press tongs:
Image Gallery
Photo from
Step 1: Purchase a fitting for crimping
Step 2: Processing the pipe for crimping
Step 3: Making the connection with press tongs
Step 4: Checking for leaks
The nuances of working on a water pipe under pressure
For insertion into the pressure pipe, electric-welded saddles and clamps with a built-in mill are used. It is located in a special sealed nozzle housing. To drill plastic, it is often enough to turn it with a hex wrench. But there are models for the drill.

The presence of a sealed branch with a mill inside ensures that there is no water spray at the time of drilling a pressurized pipe
Some of these designs include an integrated valve. Then, after drilling is completed, the cutter rises, the valve closes, and the nozzle with the drill is removed. Instead, a branch pipe is mounted.
However, there are also commercially available products with a branch pipe, which is directed laterally from the drill (parallel or at an angle to the connected water supply).
The use of linings with an internal cutter allows you to crash into any water pipes. It doesn't matter if they are under pressure or not. But such nozzles are much more expensive than ordinary clamps and saddles.
They greatly simplify the insertion process, but they will have to be spent on. At the same time, they do not exceed and are not inferior to standard solutions in terms of the tightness of the resulting compound.
There are many nuances in connecting a branch to a plastic pipeline. There are different types of plastics, and fittings in design, and insertion methods. To prevent blunders, we recommend that you watch the videos below on this topic.
Video # 1. Insertion into a pipe from PND under pressure using a saddle with a mill:
Video # 2. Features of mounting an electrowelded saddle:
Video # 3.Nuances of tapping into a polyethylene water supply:
Crashing into existing plastic plumbing is rare. But sometimes you need to change pipes, install water meters or corny connect additional plumbing. There are several different types of fittings and tie-ins for this.
For any case, there is an optimal option so that the installation can be carried out independently. It is obligatory to delegate these works to professional plumbers only in the situation of connection to the general water supply, where preliminary approvals are required.
Please write comments in the block located under the test article. Tell us how the insert was made into the polymer pipe with your hands. Share information useful for site visitors, ask questions, post posts with your opinion and a photo on the topic.