A separate section in the design of engineering communications is the planning of a sewer system. Owners of cottages and country houses often have to independently draw up a scheme and install equipment, so you need to know the nuances of organizing work.
The effectiveness of the system depends largely on whether the wiring of the sewage system in a private house is correctly performed - the internal pipe system and equipment connected to them. For competent design, it is important to consider everything: from the choice of components to the material of manufacture of individual elements. And we will tell you how to do it right.
Sewerage system design
Unlike electricity, gas, and water supply systems, which are installed according to documentation certified in certain instances, it is allowed to equip sewers on their own land plot and in the house without authorization papers.
However, a project cannot be dispensed with, since it will insure against errors related to the violation of generally accepted requirements.
For example, one of the most frequent violations is non-compliance with the boundaries of the sanitary zone when installing a drain pit. Supply and drain systems must not be in contact with each other.

The option of arranging communications in a private one-story house - the external water supply and sewer system are located on opposite sides of the building
The internal wiring device is often associated with errors in the organization of ventilation, the wrong choice of pipe diameter or angle of inclination.
The construction of the axonometric scheme is usually done by specialists. They also perform hydraulic calculations of the internal network and the trunk located on the outside of the building. Now there is a more interesting option - creating a sewage model in 3D format.
3D modeling programs allow you to create an accurate and complete project that simplifies the choice of pipes, fittings, fasteners, as well as installation methods.
For a project they turn to specialists when they want to reduce risks. But there is another option - to study the sanitary and technical standards, get acquainted with the internal wiring diagrams, learn to understand the quality of plumbing equipment and draw up a project yourself.
Placement of important system nodes
The peculiarity of autonomous sewage is that the principles of its arrangement depend on each component in the overall system.
For example, the criterion for choosing a wastewater storage device is not only the number of people living in the cottage, but also the number of connected sources of technical and household water discharge - from the house, garage, bathhouse, summer kitchen.

An approximate scheme of interaction between internal and external sewage systems with the mandatory installation of a fan riser. The cleaning function is performed by a factory-made septic tank
According to the place and main functions, the sewage system is divided into 3 categories:
- internal - a network of pipelines from plumbing equipment to the outside, outside the walls of the house;
- outdoor - a highway from buildings (houses, baths) to treatment equipment;
- cleaning systems - septic tanks, reservoirs, filtration fields, wells, sedimentation tanks, biological treatment plants.
Pondering the scheme of the internal wiring of the sewage system in the house, it is necessary to take into account the location of the external highway and the cleaning (storage) equipment.

If there is a centralized system for collecting and treating water, it is more rational to connect to a common pipe or treatment plant, if this option is cheaper than buying a septic tank
A full-fledged system includes not only domestic waste water discharges, but also stormwater - a set of storm water inlets, gutters, pipes and connecting elements, which is responsible for collecting and accumulating rainwater.
Domestic sewage on the schemes is usually designated K1, storm - K2. There is a third type - K3, but this is industrial equipment that has nothing to do with private sector.
Source Data Analysis
The conditions for arranging the sewage system are different for everyone. For small country houses, the simplest system is typical: a riser with a pipe outlet to the bathroom, where a toilet and a shower are installed.
Large or two-story cottages are equipped with a network of pipelines that also converge to one riser, less often to two.
Accordingly, the projects for different houses will be different. To take into account all the nuances, it is necessary to answer a number of questions before choosing a scheme:
- What method of sewage treatment is appropriate?
- Is it possible to connect to a centralized sewage system?
- How much wastewater should a treatment plant take per day?
- How often will they use the drain system? (Year-round, seasonally, on weekends).
- Is additional insulation necessary for the pipes?
- What pipe material is best for networking?
- Will the drains be drained by gravity or will a pump be required?
Most of the questions will arise in the process of drafting the project, when you need to choose a wiring diagram and materials for its assembly.

For the movement of wastewater by gravity, all pipes are placed not parallel to the floor, but at a small angle. The tilt is always directed from the plumbing fixtures towards the riser
In the same way, an external pipeline is laid - with an inclination from the building to the pit or sewage treatment plant.
Important internal network device rules:
- the cross section of the pipes is selected taking into account the volume of effluents;
- during installation, the principle of serial connection is used;
- the number of turns and sudden changes in height minimize;
- Be sure to install ventilation equipment;
- think over the installation site of the inspection hatches;
- choose thermal insulation for areas passing in unheated areas.
If the pipeline has a long length, it is difficult to withstand the slope along the entire line, so additional equipment is installed - a circulation pump.
Work Planning and Scheme Selection
Installation of sewer pipes is usually carried out together with the installation of water supply, respectively, and it is better to design these two systems together.
If you summarize all the documents that make up the project and try to act according to the rules, you get the following list:
- General data - description and installation conditions of water supply and sanitation systems based on regulatory documents.
- Explication of premises (explanation to the scheme) indicating wet areas and how to waterproof them.
- Calculation of volumes of water consumption and wastewater taking into account the norms.
- Floor plan of the location of the water supply system and axonometric diagram.
- Floor plan of the location of the sewer.
- Specification - a listing of all components with an indication of quantity or footage.
The last point is difficult to calculate if there is no exact scheme (model) of pipelines with the designation of all turns and connections.

The diagram shows the diameters of the pipes, elevation marks of the trunk relative to the UChP (level of the clean floor), the location of the collectors and plumbing fixtures
With the schemes developed for a specific building, making wiring becomes much easier, and with modern materials, almost anyone can do it.
Therefore, the owners of new private houses do the following: they order the documentation from the designers, and do the installation themselves.
The device of the internal drainage system
The internal sewage system has long assumed a typical form, which can be called as rational as possible: horizontal pipes are connected to risers located vertically. The riser is designed for increased volume of drains, so its diameter is larger.

The movement of water from the shower, toilets, sinks to the riser occurs either by gravity, or forcibly - under the influence of pumping equipment
The internal wiring is connected to the external line, which consists of pipes of even larger diameter. The pipeline leads to a septic tank or other sewage treatment plant.
The location of the riser and the lines connected to it is subject to certain rules. For example, all wet areas are usually located in adjacent rooms: the kitchen is through the wall from the bathroom or toilet. Often the rooms are combined, an example of this is the shower room, combined with a toilet.

It is customary to locate rooms in which tap water is actively used because of practicality, ease of maintenance and material savings
So the sewer pipe has a minimum length to the riser, therefore, the drains move out by gravity, without additional coercion. The riser, in turn, is located at the exit of the sewer line and the water supply from the house.
The closest sanitary equipment is a toilet. If you place a bath or kitchen between the toilet and the riser, then with each flush, the water from the siphons will be sucked out.
Tilt is a prerequisite for a gravity system. The angle of inclination depends on the diameter of the pipe. There are parameters which it is not recommended to deviate from: for pipes of 50-80 mm - 25-35 mm / meter of the line.

If the pipe is wider than 80 mm, then the slope should be 20 mm / m. Such a situation is rare for private houses, this diameter is typical for outdoor pipes
Thus, the wiring in the country house should cover the minimum set of plumbing equipment: toilet, kitchen sink, shower (bath).
Residential buildings usually have more connected appliances, among which there may be additional sinks and toilets, a jacuzzi, a dishwasher, a grease trap, chopper, etc.
When installing the system can not do without turns, although it is recommended to reduce their number. Each drop and turn is a chronic risk zone, causing a blockage.
If sharp turns cannot be avoided, it is necessary to provide free access to them: either leave them open or disguise by equipping the inspection hatch.

According to the rules, a rotation of 90 ° is carried out sequentially by two shaped parts providing an angle of 45 °, and if space permits, then by three rotary parts (elbows) of 30 °
Placing wet rooms and a sewage treatment plant or line leading to the central pipe should be planned in advance. Ideally, they should be located next door, literally - behind the wall.
The closer the sewage elements are located to each other, the less problems its functioning will cause.
To avoid gross errors during installation and to be safe, we recommend that you study SNiP 02.04.01-85, which sets out in detail the rules and regulations for the plumbing and sewage system.
The main stages of the work
Installation works are carried out in stages. Sometimes the sequence of events varies - a lot depends on the readiness of the premises and the particular layout.
But still you need to strive for a generally accepted order:
- Release stacking - pipes connecting the internal and external systems. It passes through the wall, so it should be placed in a sleeve - a thermally insulated safety casing. There should not be any joints and joints at the transition section through the wall.
- Installation of the riser - a vertical pipe running through all floors and floors. Usually they install 1 riser, but if the length of the internal trunk exceeds 10 m, then it is better to install the 2nd.
- Pipe routing - bends leading to plumbing equipment. The diameter of the pipe leading from the toilet is the largest - 100-110 mm, the rest are 50 mm each.
And only after the installation of sewage pipes is the connection of devices followed by testing of the system.
Recommendations for installation work:
Image Gallery
Photo from
The riser is usually installed on the territory of the toilet, equipping a special shaft for it or leaving it open. If you use a lining, you are sure to arrange an inspection hatch
The riser is mounted in a corner, a short distance from the walls, on special clamps. It should not come into contact with ceilings and other building elements, so as not to create additional noise
The hole in the wall of the building is made about 20 cm wider than the pipe. It is covered with waterproofing, then a sleeve is inserted, protruding from both sides by 10-15 cm. The gap between the sleeve and the pipe is foamed
There are several ways to connect sewer pipes. For installation in a private house, welding or adhesive technology is recognized as irrational, the bell method is almost always used
To attach the taps, use oblique outlets or crosses. To make the connection airtight, use rubber sealing cuffs inserted into special flutes of the sockets
The diameter of the branches leading to the sewer pipe should be equal to or greater than the pipes of the plumbing equipment, otherwise the drains will slowly go away and it is possible flooding the room
It is not recommended to connect pipes from different materials, as well as use foreign fittings. If possible, large transition nodes should be purchased ready-made and not made up of several parts
Long internal networks are equipped with a centrifugal pump. The forced system has its drawbacks: it depends on the supply of electricity, sometimes it fails, requires expensive repairs
Riser in the toilet or in the combined bathroom
Riser positions relative to walls
Bell-shaped connection of pipeline elements
Connecting pipes to the riser
Plumbing fixtures
Elements of the sewer system
Forced sewer
Metal pipes and fittings are no longer used. Cast iron was replaced by light and practical polymers: PVC (gray), PP (light gray or white).
Plastic pipes have a perfectly smooth inner surface, excellent resistance to heat and aggressive substances. They are easy to handle and install due to their light weight.
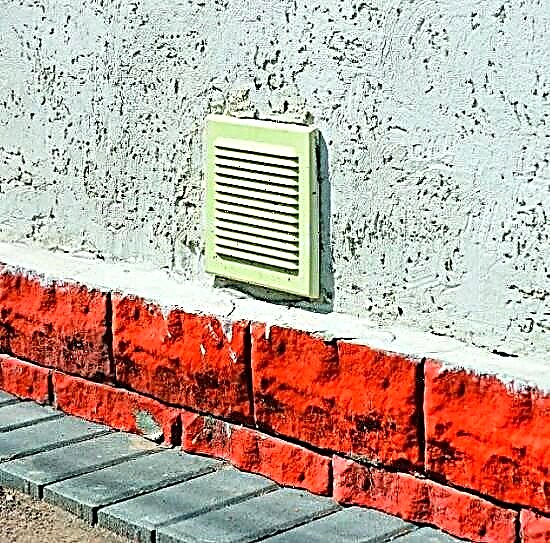
Ventilation system equipment
In order to comply with sanitary standards and make living in the house as comfortable as possible, the sewage system must be equipped with ventilation.
To prevent stagnation of gases in the pipes and their penetration into residential premises, a fan pipe is installed.

A fan pipe is a simple vertical structure that resembles a riser in appearance. It is taken out onto the roof so that the vapors escape into the atmosphere.
You can refuse to install additional ventilation equipment, but provided that the private house is not higher than 2 floors, and the load on the sewer network is minimal.
If there are a lot of people living in the building, the number of bathrooms is more than 2, the drains are discharged to the treatment plant, then the installation of the fan pipe is required. Thanks to her, the atmosphere in the house will be healthy, and the water from the hydraulic locks will not disappear anywhere due to the pressure difference in the network.
Features of wiring in a multi-storey building
The number of risers due to the presence of the 2nd or 3rd floors does not increase, but the connection scheme is complicated, since the bends are present on all floors. For multi-story homes, there is a “code” set forth in the SNiP documents.

According to the rules, functionally identical rooms should be located one above the other.This mainly applies to bathrooms, since the kitchen in a private house is usually one
The length of the risers increases and the presence of a fan pipe becomes mandatory. It is displayed above the roof about 1.2-1.5 m in height. Instead of a fan pipe, a vacuum valve is sometimes used.
The protection of the riser in the floors is carried out using compensators necessary to suppress linear expansion. The remaining principles of installation, as well as the connection of the taps are preserved.

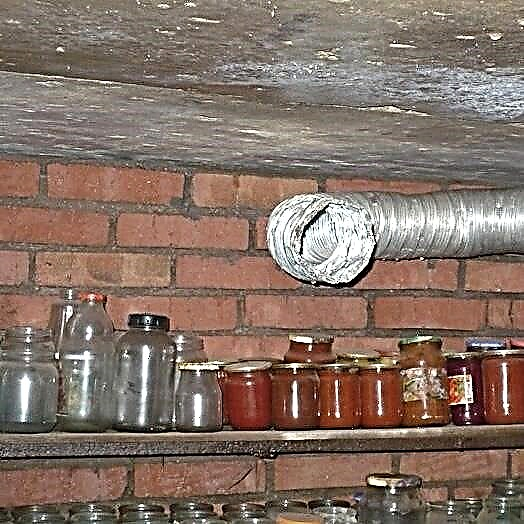
In one-story cottages and country houses, the basement is usually used as a cellar or pantry. In multi-storey buildings in the basement, garages, pools, guest rooms are often arranged
For basements and basements equipped with toilets, there are rules. If the toilet is below the level of the sewage treatment plant, a fecal pump will be required to move the waste material.
The pumping system is more expensive than gravity and is volatile, which has its drawbacks, especially with frequent power outages.
Tips for installing plastic pipes:
More about wiring in the bathroom:
Ventilation device and fan pipe outlet to the roof:
Specialists or, at least, people with an engineering education should be involved in the drawing up of schemes and the design of the layout of sewage in a private house.
Self-planning from A to Z is only possible after a thorough study of building codes. And the assembly of the sewage system is a completely different matter. It is affordable even for an amateur, if you strictly follow the instructions and carry out installation according to the schemes.
Have questions, find bugs or have valuable information that can complement this material? Please leave your comments in the box below.